To get our apps virtual options to show up correctly in the packing slip, you will need to edit the code for the packing slip template.
How to get to Packing Slip Template
To topClick here to go directly to your Packing Slip Template. You can also use the directions below if that doesn’t work.
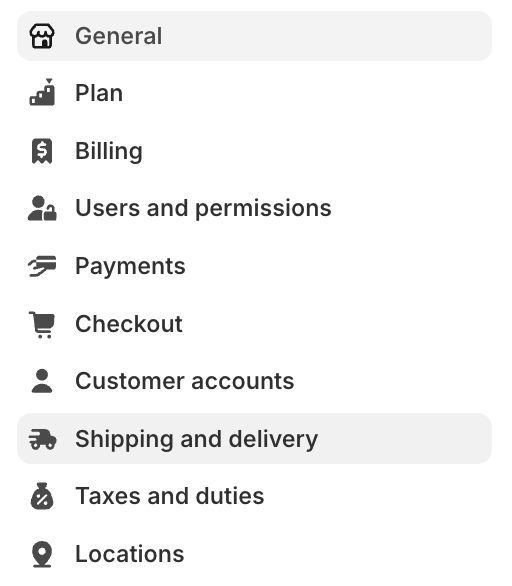
- Go to your Shopify dashboard
- Select Settings (bottom left)

- Select Shipping and delivery
- Go to Packing slips (near the bottom of the page)
- Click Packing slip template

How to edit the Packing Slip code
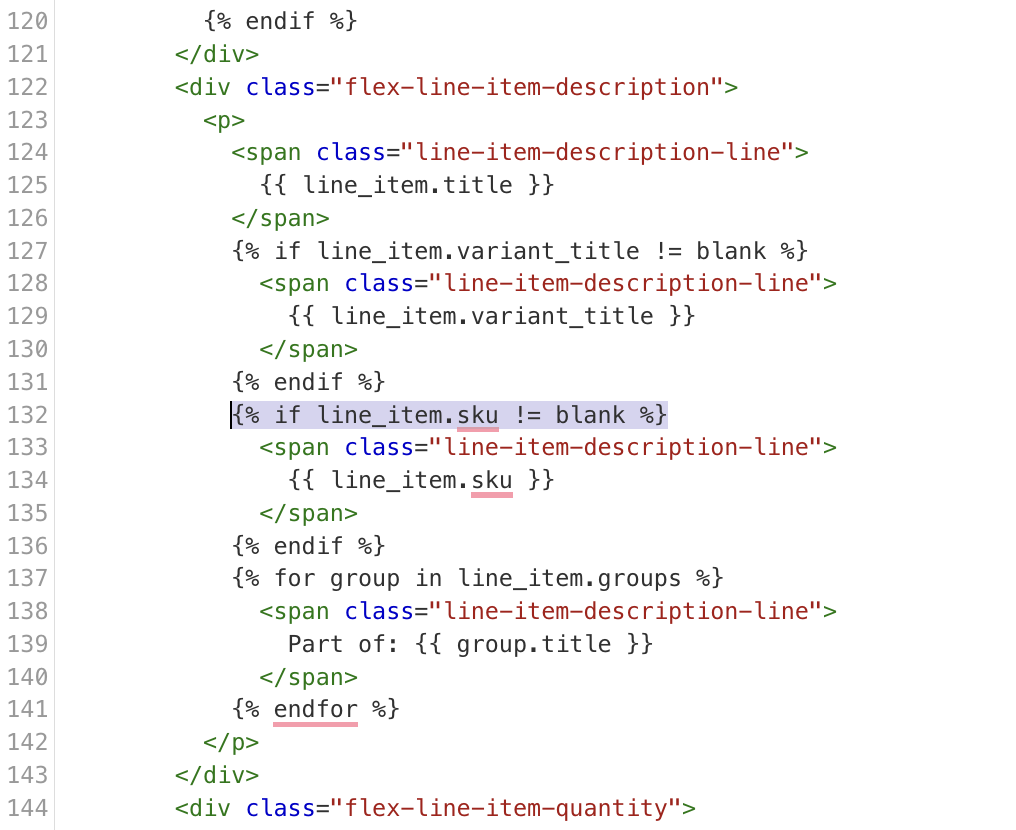
To topIn the Packing Slip template search for the code below.
{% if line_item.sku != blank %}The code should appear on line 132 like in the screenshot below.
If the code looks different than the screenshot above you can revert the code back to default by clicking the “Revert to default” button.
{% for p in line_item.properties %}
{% unless p.last == blank %}

{{ p.first }}:
{% if p.last contains '/uploads/' %}
<div class="bcpo-cart-file"><img src="{{ p.last }}" style="max-width: 50px; height: auto;"></div>
{% else %}
{{ p.last }}
{% endif %}
<div class="item-description-line"></div>
{% endunless %}
{% endfor %}
You’ll need to add the code above, before for the {% if line_item.sku != blank %} code (see screenshot for the exact placement):
The result will look like the screenshot below.

Make sure to Save the changes at the top of the page.
This code will add the virtual option selections to the second page of the packing slip. If you want to add the selections to the same page you will need to make the shipping required. Click the following link for instructions on how to make the shipping required for virtual options.
Click the link below if you want to use Shopify’s Order Printer App.